Artist's eye - Putting the Painter Back in Texture Painter
With the creation of powerful tools and software packages for texture artists over the last few years, we’ve become more efficient as artists in our approach to creating textures for assets within film, animation and games. This has been positive on many levels but I see a trend, especially in less experienced artists, that is concerning.
We are starting to lose the painting part of our role, and as a result lose our artist’s eye. An overuse or reliance on procedural textures is over taking our understanding of why we started using them in the first place. Automation can be incredibly beneficial for efficiency and schedules, but it can also bring about a loss of skill or even worse, complacency. With shorter schedules and lower budgets, it can be difficult to not move solely in a procedural direction for texture/shading creation. However, through proper planning and wise use of procedural to tileable textures, you’ll have time to use your painting skill set to bring the most out of your creations.
Time management and critical thinking, will help artists use the combination of procedural and painted textures. I have always believed to be a better artist, you should be studying your surroundings, studying life. Looking at references from the internet and books is always necessary but actually getting outside into your environment is key. Seeing how light interacts with objects and their surfaces and looking at what is actually built into or onto those surfaces, and at what distance do those features stay or blend away is key to understanding how to texture an asset. The tactility of it is vital in becoming a better texture/shading artist.
As we know, or should know, there is never one brush or package that meets all the needs of an artist, so why would a texture map be any different? A tileable, procedural generated texture or PBR material is a great starting point and may be needed for a first pass but it shouldn’t be the finish line. If you combined that starting texture with a few other texture layers, masks, etc, you would then have something more interesting to show and build upon.
The human eye wants to stay interested, we like to see stories. An organic variance, even with hard surface, helps build out that story. I try to start every asset I work on for film, animation, games and various projects this way. What is the story of the subject? Is it old? Is it new? What makes it interesting? How does it fit into the world needed for the project?
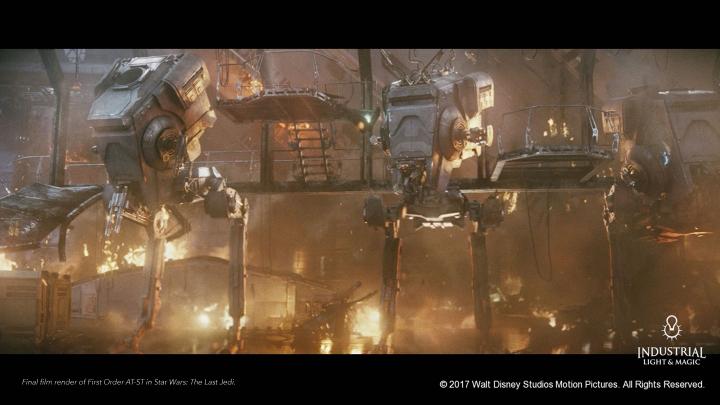
Sometimes we are fortunate to get a thorough design brief that helps us answer some of those questions, but not always, so it’s a good habit to ask them yourself. This helps give an understanding of how to approach what you want to paint and shade, as well as helping to create consistency between multiple assets. For myself, from painting plants on Avatar to adding micro details on an AT-ST for Star Wars, it’s the story that helps build the blueprint for what needs to be painted.
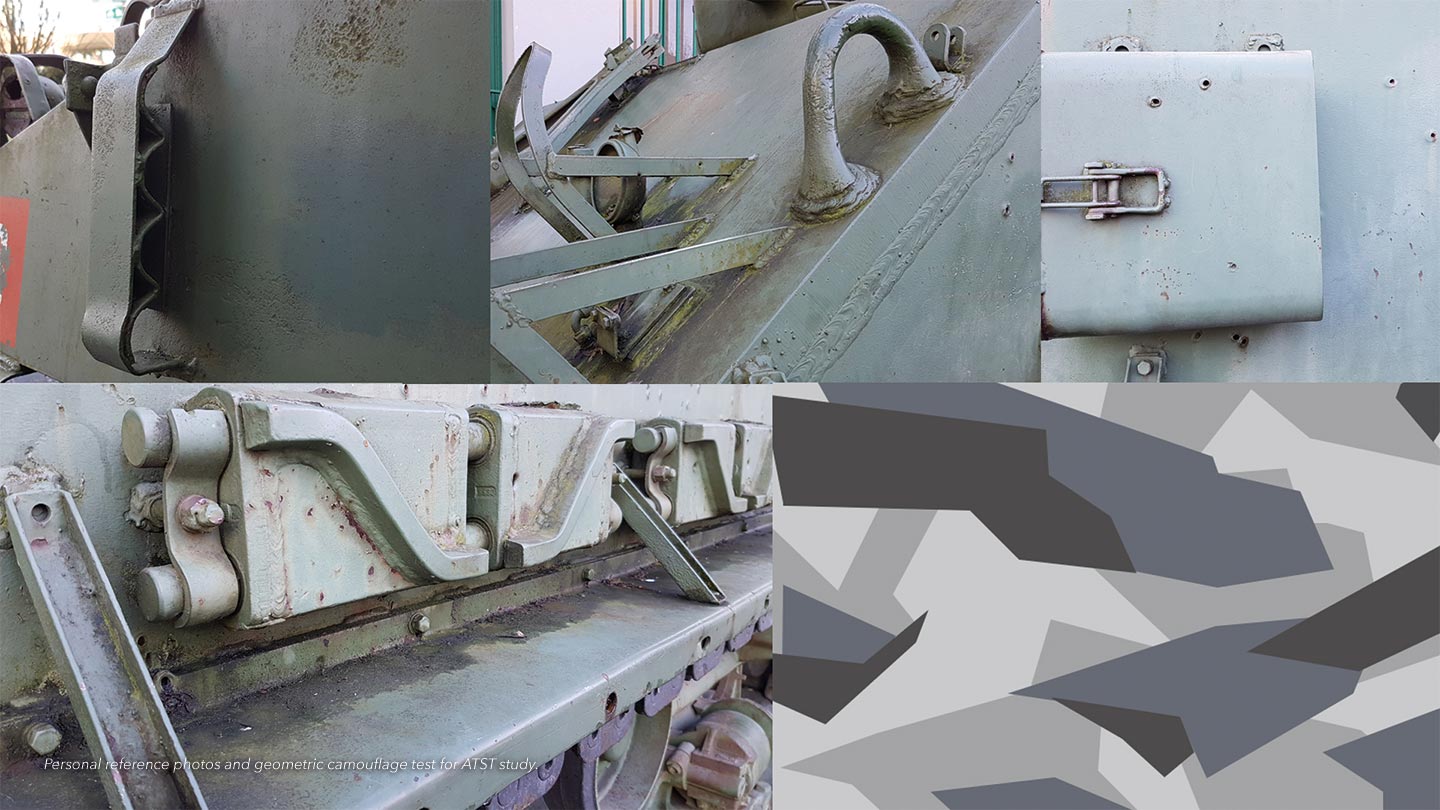
Next I start to work on the scale of the subject, before getting into smaller details. When reviewing artist’s work, there has been times that their sense of scale for the textures is off compared to the asset size. Things like the cracks and chips are too big on a hard surface asset, or clothing and skin details don’t match what we should be seeing. Whether it be stylized or realistic, if it breaks the suspension of disbelief, everyone will feel it. When I worked at Pixar, the materials and textures adhered to real world parameters, even though the models were stylized. We, of course, were able to push the scale of details to get the desired look but because of the parameters that were set, we knew how far we could go.
I find procedurally generated and tileable textures very helpful, as it gives a great base very quickly through layering. Creating your own tileable textures is a powerful way to keep your textures layered and non-destructive, while being able to share that texture for consistency with other assets. Laying something down quickly with procedural methods frees up time to spend on the important areas of the asset you know will take time to hand paint. A subtle tileable can be added as a finishing layer on top of your desired texture channel, giving it a little more complexity to how it reacts with light. Using various masks on the procedurals, you can create a more organic look, as well as help with the positive and negative space.
Texture/shading artists starting out tend to over complicate their textures and make everything too busy. You don’t want to confuse the eye, you need a place for it to rest. Think of it like brush economy in traditional painting. Sometimes when you over texture, you see the similarities more easily and you lose the organic quality. You don’t want it to have the ‘ladder effect’, the sameness across the entirety of the asset. Design language is key, not just in concept design or digital sculpture, but also in texture creation. This is a great reason to study traditional art. From painting to sculpture, it helps to see where the detail is used for conveying the story of the subject matter, as well as the lighting and how complementary colours are used.
An important part of creating production art is not just the art itself, but time management. For a lot of professionals (including myself) it takes a long time to get right. I am constantly scribbling notes down on what I need to get done and how long it may take. With the ebb and flow and constant changes that can happen in the studio or freelancing, I try to keep my workflow as non-destructive as possible. Even though I try to keep things simple, I still use multiple packages throughout the day. This can change based on the type of asset I am working on but more often than not, my overall process stays the same.
I use Mari as my main package for texture painting, as well as a hub to bring my texture work together from other packages. I mainly create tileable textures through Photoshop or Substance Designer and then bring them into Mari to be used with the paint through tool or as a tileable or TriPlanar texture. Procedural generated textures and masks are usually created in Mari before baking down for export. Sometimes I will do a quick poly paint pass in Zbrush and bring those maps and masks into Mari to be layered in accordingly.
I also constantly use the projection cameras in Mari to set up the angles I need for painting, either in Mari or to bring across into Photoshop. These cameras are great for projecting any graphic line work that may be needed. It’s also a massive time saver being able to bring in alembic cameras from a specific shot, so you know what you need to paint. Plus, being able to bring in various HDRs, that may be used on a show, can save time seeing how the textures may react when rendered. I tend to use Modo and it’s renderer to bake out various maps such as ambient occlusion or edge detection, and then bring those into Mari afterwards. Using Mari, not just as a paint package, but as a centrifuge of all my texture work, keeps all my maps consistent, and everything in the necessary colour space (OCIO). Having everything as efficient as possible, frees up more time to paint, experiment and make mistakes which is key to your growth as a texture artist.
Also keep in mind that properly laid out UVs are essential. Too many artists are not placing down their UVs in a smart way. Whether they aren’t relaxed properly or aren’t broken out into identifiable groups for similar materials. With a movement towards a more udim workflow, packages like Mari have made it easier to plan for how the UVs should be laid out. Good painted textures take time but there are details that can only be achieved by the manual process of painting them. For me, this should be the most fun part of the process so don’t force yourself to fight your UVs.
Once I have a half decent first pass, I get my maps over to Katana to render. Your final output and how it looks overall is the most important part. Knowing your render engine and understanding what it takes for the final image is key to getting the most out of your textures. The sooner you know how your maps will react, the better. What you paint is not always what you get.
Being able to quickly toggle back and forth in a package such as Katana between your various outputs, really helps give a better understanding of how your textures are reacting and what needs to be changed. As a general rule, it is always better to push it more and then dial it back. Very rarely will an artist get it right the first time, so it’s best to get those textures out there and rendering sooner rather than later. Material variation and a firm understanding of how the various texture channels work together will help you get the most out of your textures. Creating good texture maps takes plenty of work, but if we continue to build on our efficiency and time management at the beginning of a project, it should give us the time we need and want to build on our texture painting skills.
About Raine Anderson
Raine is a self-taught artist that has been working in the film, animation and game industries for over 20 years. He has worked at various studios such as Animal Logic, Weta and Pixar honing and building his craft. Currently, Raine resides as a Texture Supervisor at Industrial Light & Magic in Vancouver, Canada.
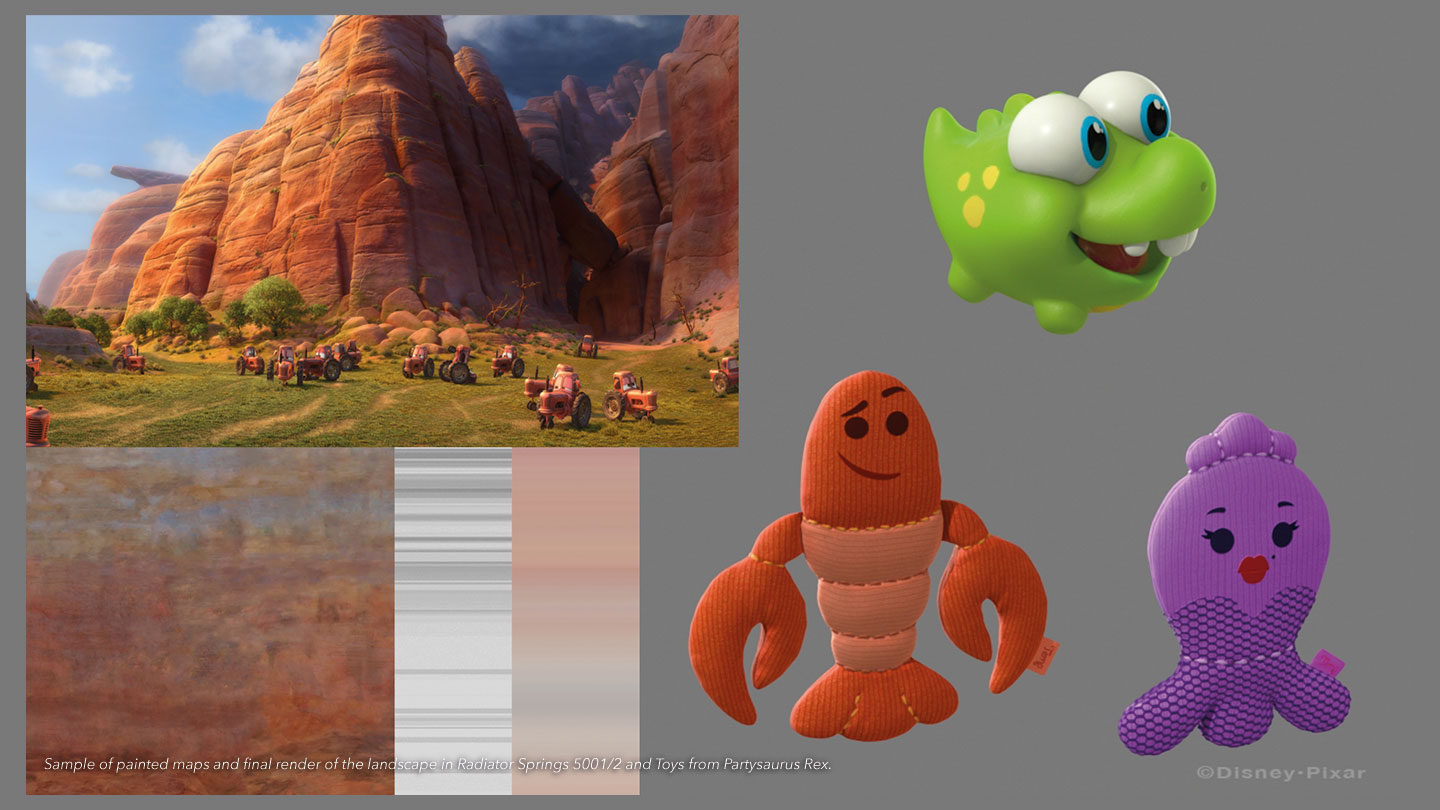
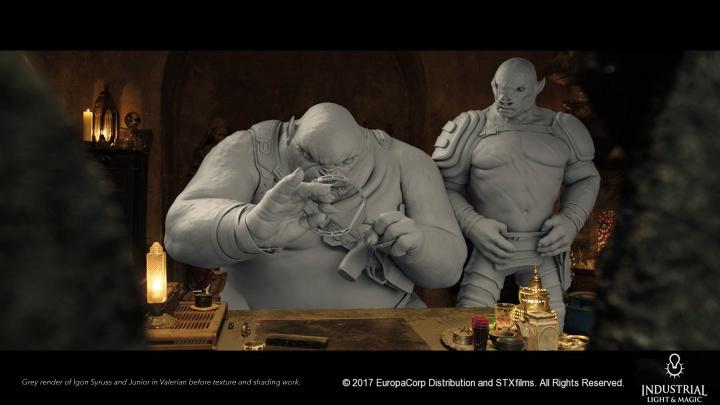
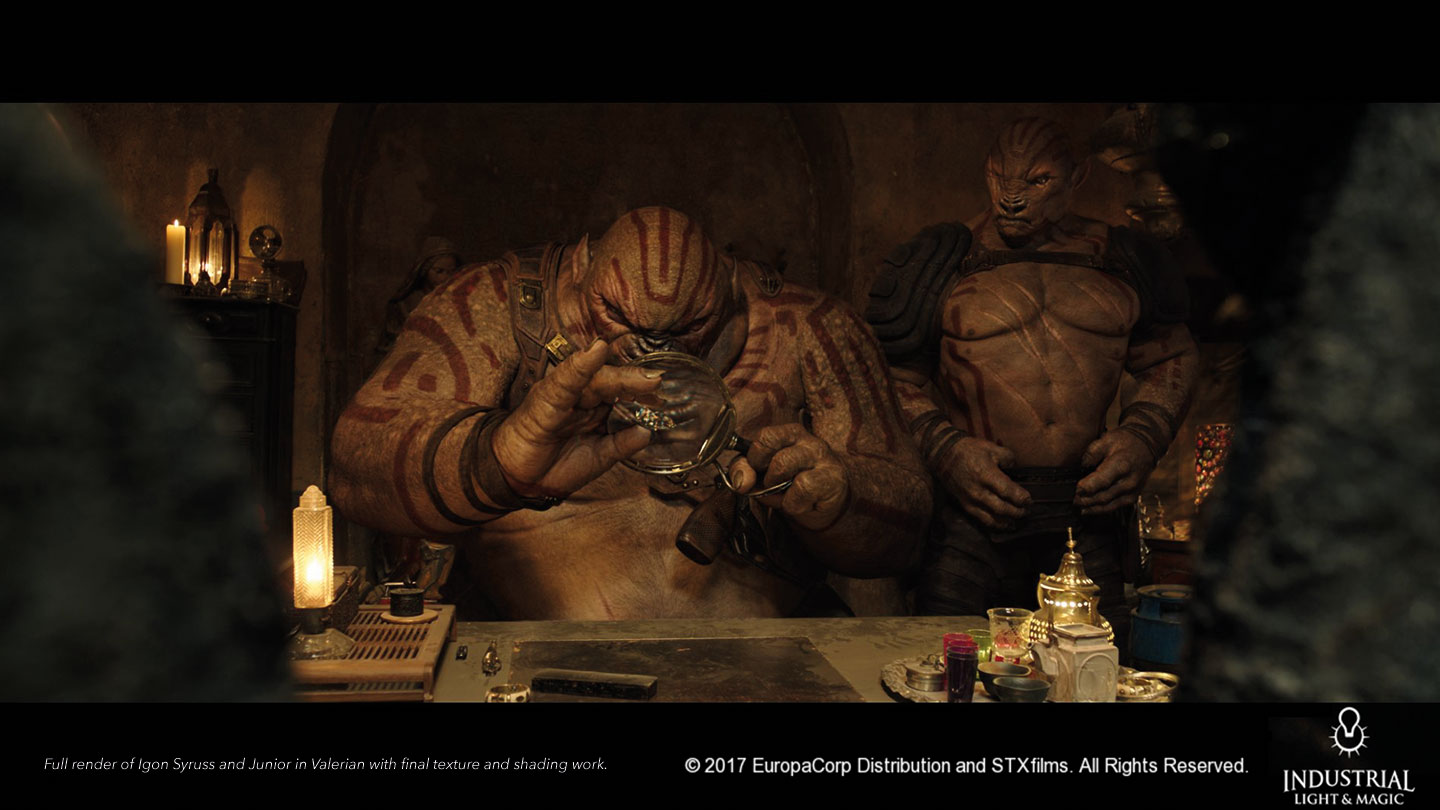
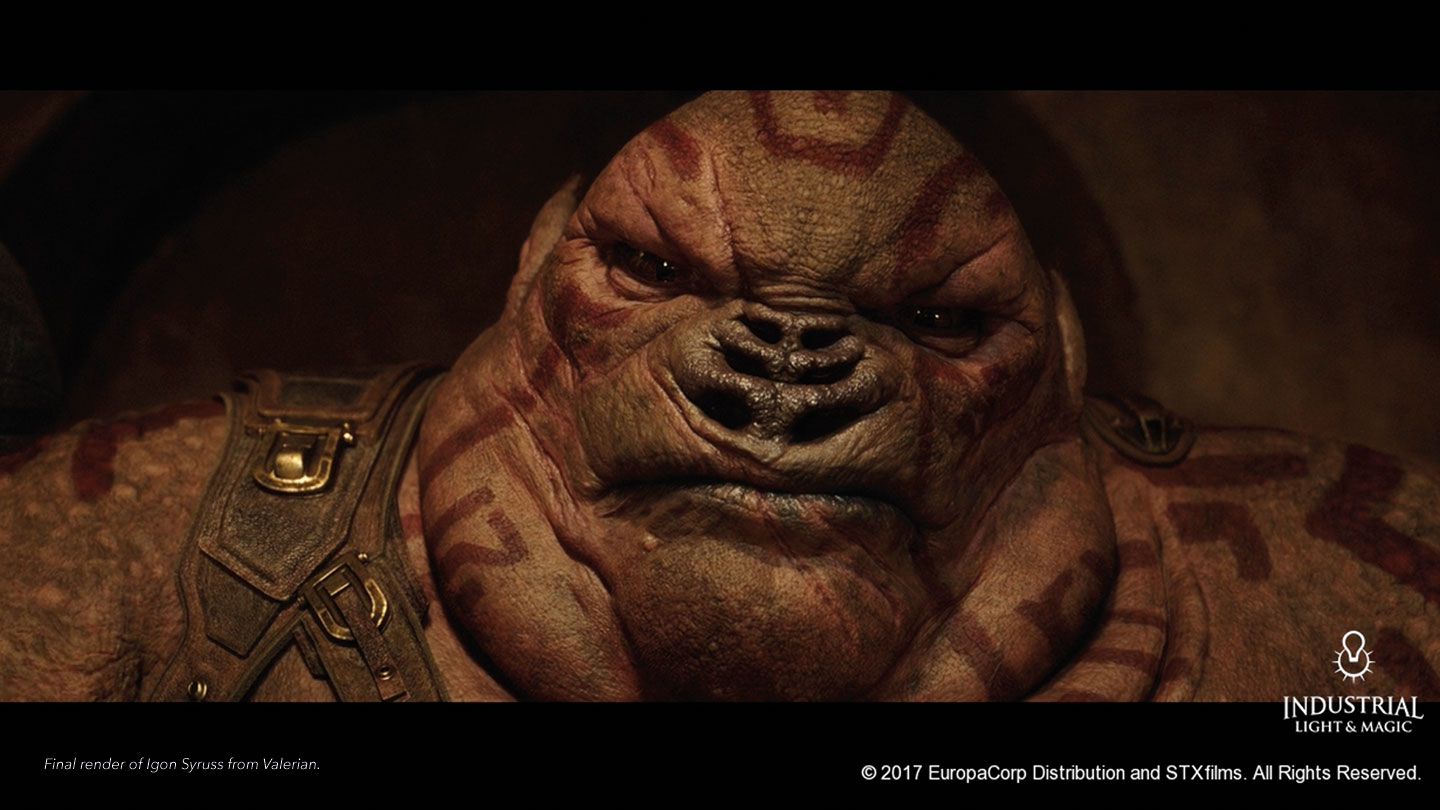
Some of his feature film credits include Happy Feet, Avatar, Rise of the Planet of the Apes, Partysaurus Rex, X-Men: Days of Future Past, The Revenant, Valerian and the City of a Thousand Planets, Star Wars: The Last Jedi and Black Panther.
Besides professional work, Raine also continues to work on his personal projects that include Children’s book development, graphic design, concept design as well as consulting for schools and studios in the creative development field.
Instagram: @raineandersonart
artstation: https://www.artstation.com/raineanderson
imdb: https://www.imdb.com/name/nm1923654/?ref_=nv_sr_1?ref_=nv_sr_1