Lighting challenges in episodic animation: how to solve the limited time crisis
In recent years, episodic animation has seen an increase in demand due to its growing popularity amongst audiences. Animation isn’t just for kids anymore. It now appeals to a broader audience as it touches more adult themes and drives emotion — and no, we won’t believe you if you tell us you didn’t tear up watching Soul.
Lighting in animation, and in VFX in general, is pivotal in setting the mood for a whole sequence — it’s what makes you feel warm and fuzzy when you see warm light tones on your screen, but also something that makes you tremble in suspense when you see a gloomier background.
But what about you, the lighting artists behind the art?
As a lighting artist in animation, do you remember your first reason for getting into the industry? Was it to see your name in the closing credits? Was it so you could say "did you see that scene on that Netflix show? I lit it"? While all these could be true, the main reason is usually wanting to create beautiful and impactful scenes.
As inspiring as that is, there’s a list of frequent pain points across episodic animation. In this three-article series, we’ll be touching on these pain points and more — not for the sake of opening a Pandora’s box of challenges but to actually offer you solutions to make your lives easier and offer you more creative freedom.
In this first article, we’ll talk about numbers: the number of shots that lighting artists need to go through in episodic animation is large. How can you make that more manageable? Are there any useful tips and tricks? We’ll then have a look at what we need to make that abundant number of shots easy on the eye, as well as enhancing the overall workflow. What does Katana’s have in its toolset for lighting artists?
Read on to find out....
Optimize your workflow with these tips & tricks
The number of shots that lighting artists need to go through in episodic animation is incomparably larger than for films. Traditionally, an animation film translates to around two hours' worth of shots. But how do you manage all that, multiplied by at least six, for just one season in an episodic animation? How can we save time on repetitive tasks?
When going through a never-ending flow of shots, some of the elements will undoubtedly become repetitive. Yes, that can be a challenge if you're lighting similar shots over and over. But why not use it to your advantage? For example, a particular set might be revisited quite often across a 23-episode series. Once it has been lit in Katana for one shot, it will be available for the rest of the series with no extra work. This means you’ll save more time as you can use it forever, whenever you want.
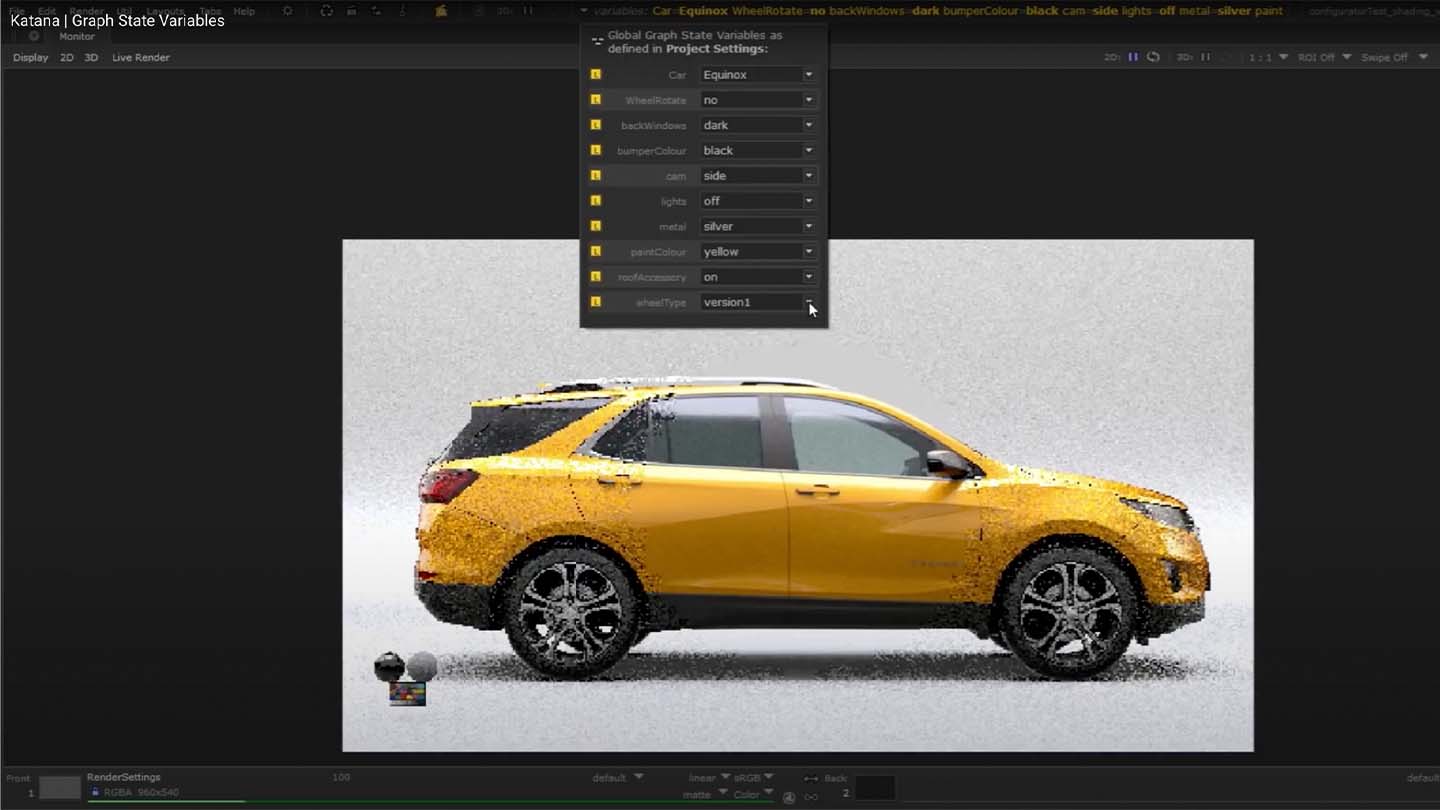
Characters are part of the repetition carnival too. We’ve all seen characters with that perfect rim on their hair. But we only need to build it once as it'll be frequently reused. This means you can create light rigs for your characters once and carry them around — that’s beauty lighting on characters sorted. Artists can also make use of Katana’s Graph State Variables.
These were designed to make it easier to set up a single project: controlling the lighting for a whole sequence, for example. As they’ve been developed with artists in mind, you have the freedom of defining your own variables and you can use them in a number of ways. The key concept behind Graph State Variables is that they enable you to define the context of the scene that's being evaluated, and have nodes whose behavior you can change in your given context. So, for your different times of day, you can just refer to a series of pre-set HDRIs (High Dynamic Range Imaging) with a flick of a switch of the graph state variable.
Shedding light on the Lighting Tools
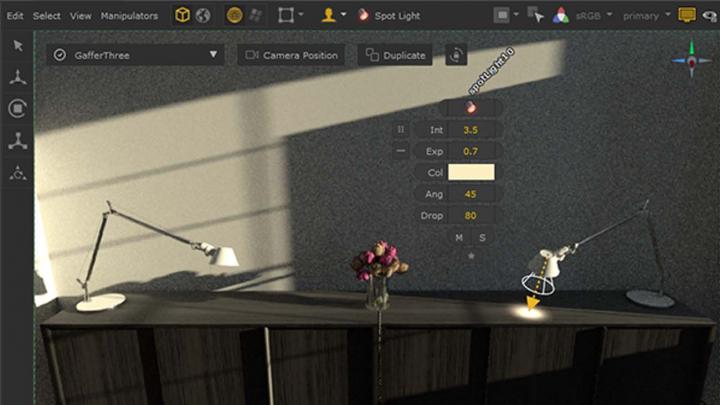
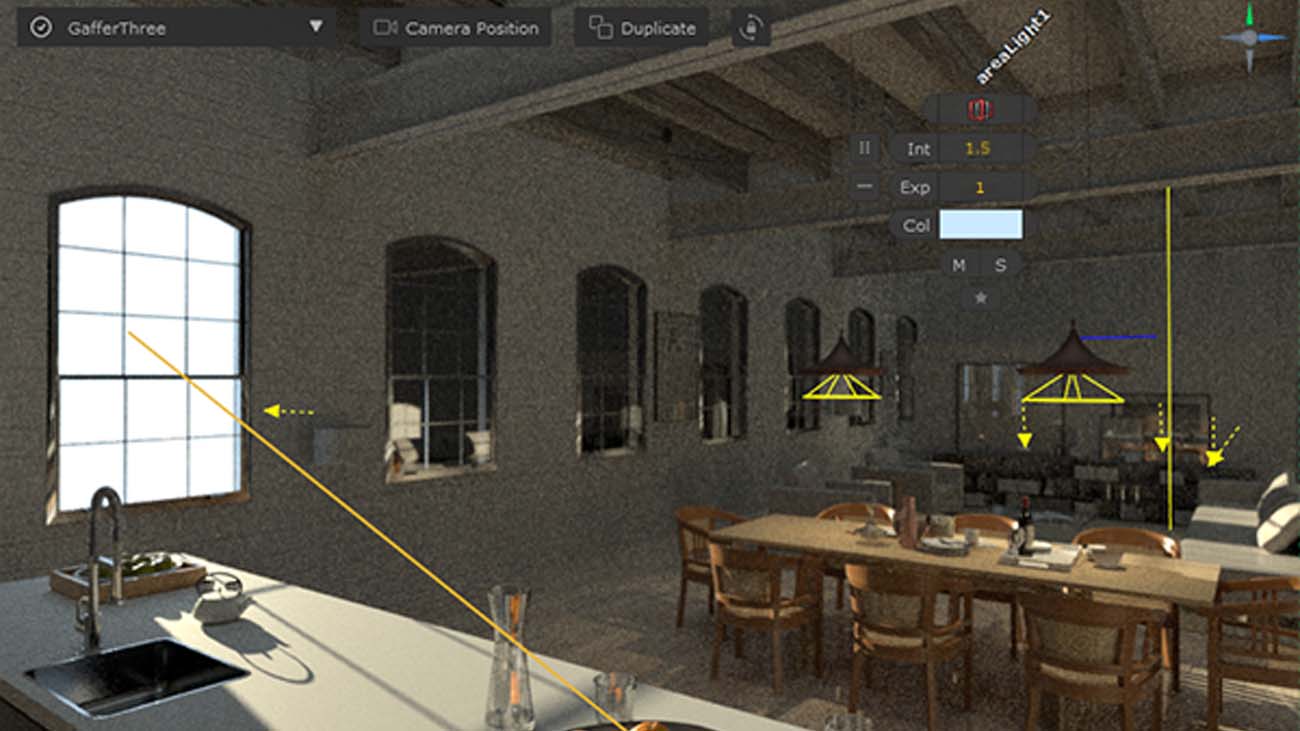
Continuing on ways to save time during your creative process, let’s see how your lighting workflow can be enhanced. If you enable the Lighting Tools button in Katana, you can work full-screen in the Hydra Viewer, offering a smoother experience when creating and editing lights in your scene. The benefits of using these Lighting Tools are the reduction in the number of steps you need to take when placing lights, and the increased accuracy of the placement.
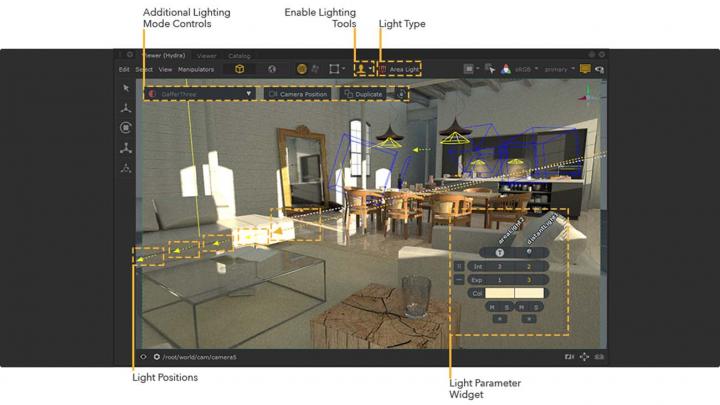
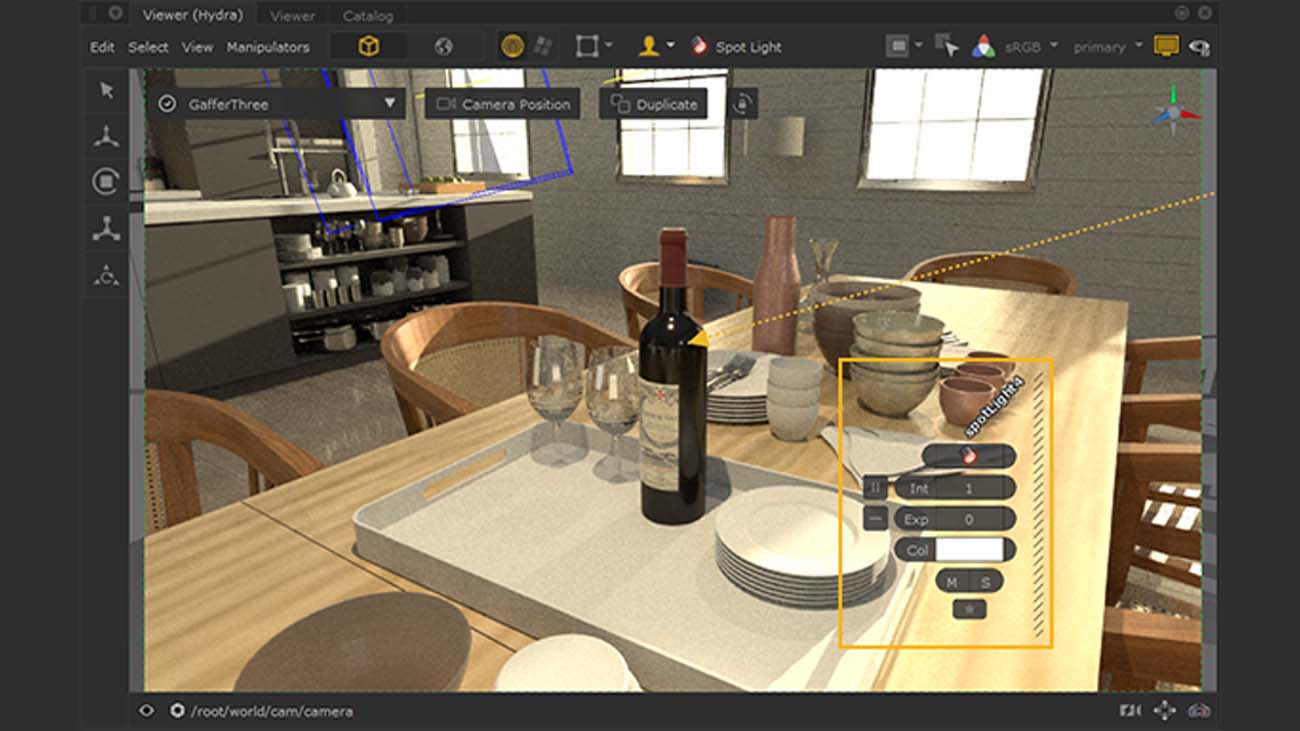
To make full use of the Lighting Tools, you can start by creating and placing lights in the Hydra Viewer. You could use the Shadow mode workflow example if you want to place lights in a context where shadow placement is fundamental. Then you can edit the lights and easily customize the parameters that are shown on your light parameters widgets. Intensity, Exposure and Color parameters for your lights are quickly accessible through the light parameters widget.
To maximize streamlining your workflow, make sure you customize this widget to show more parameters, specific to the light type you create, so you can start observing which of these parameters you use the most. In the context of a spotlight for example, we suggest that you expose the Cone Angle parameter.
You can further streamline your workflow by cloning lights and using Template Materials. Let’s imagine you have a room with five lights on one wall, each of them with identical properties. If you use the Clone option, the selected light plays the basis for the new light that you want to create. The great thing about this option is that the latter light encapsulates all the parameters of the initial selected light.
Use Template Materials if you wish to define the overall look of the lighting in a scene and make local overrides per light at the same time if you need to. After assigning a Template Material to a multitude of lights, there’s no need for you to change the parameters of each individual light because you just need to change the parameters of the Template Material.
Extra tip: make use of the Clone as Template option so you can use a selected light as a basis for a Template Material. The result? Both the new light and selected light will be assigned to that specific Template Material.
Learning how to use these Lighting Tools can maximize your chances of building a streamlined workflow so you can focus on the actual result, and not get lost on the way during the minutious process. The more you use them and incorporate them in your workflow, the more intuitive and efficient this way of working will become.
It’s a learning pattern
Now it’s settled — lighting in episodic animation comes with a number of challenges and roadblocks. And other external factors, such as budget and having to update assets from the other teams in a not-so-flexible timeframe, don’t make it any easier.
But the good news is that you can use these to your advantage by taking a step back and noticing the patterns in your creative process. While unprecedented changes can always arise, some things seem to always be set in stone: the budget will most likely always be fixed, the number of shots that you need to light will always be high, and some tasks will always be very time consuming. That’s why it’s crucial to learn how to make best use of the smart tools of the software you work with, be it Katana software or any other lighting alternative. So you can create faster, smarter and more efficiently.